This document describes how to connect to your VpnNext by using the L2TP/IPsec VPN Client which is bundled with Android. On this instruction, every screen-shots are taken on Android 7.x. (Nougat) Other versions of Android are similar to be configured (If you see at what value to be entered in field), however there might be minor different on UIs. Some third-parties customizes the configuration screens of Android.
1. Initial configurations (only once at the first time)
Start the "Settings" application on Android.

In the "Wireless & Networks" category, and tap "VPN".

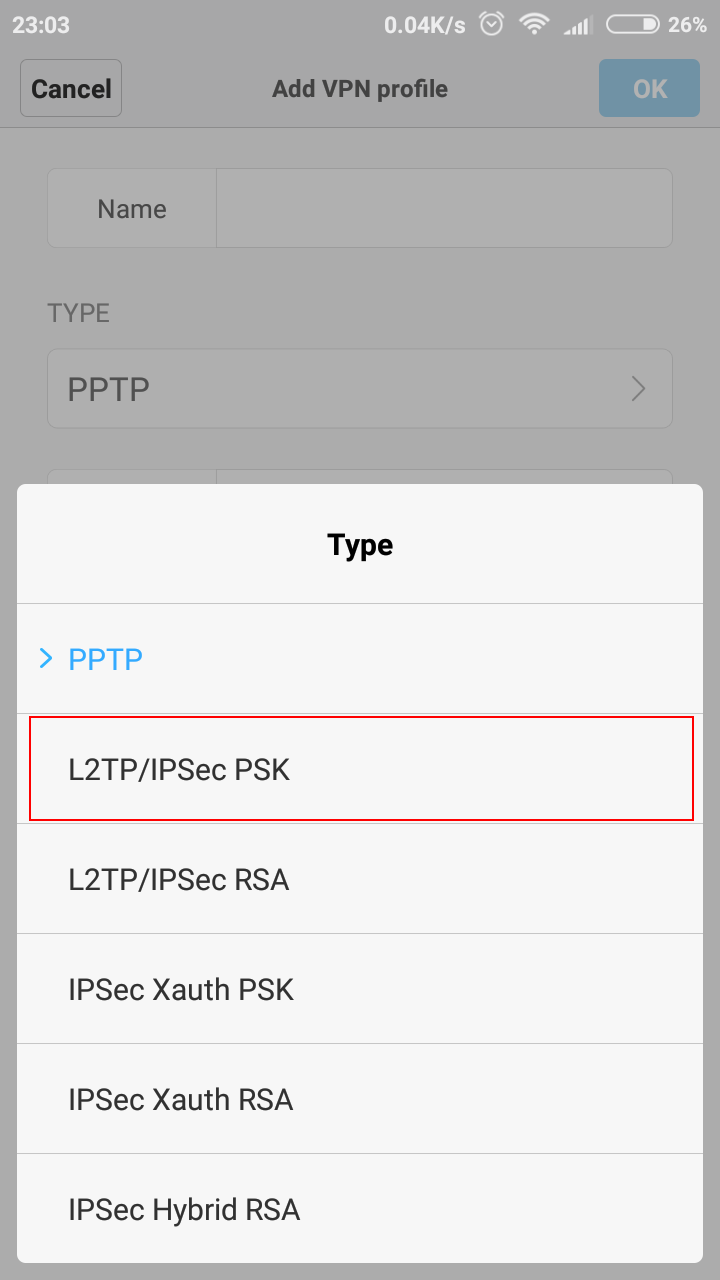
Click the "Add VPN profile" button to create a new VPN connection setting. There click on TYPE and select L2TP/IPSec PSK

Input something string on the "Name" field (e.g. "VpnNext" ), you have to specify hostname of the destination VpnNext VPN Server.
In IPSec preshared key enter "vpn".
Username and Password, enter credentials as mentioned in your profile. After this click on 'OK'
2. Connecting to VPN

After creating your profile, you can see your profile is appeared in Vpn Configuration. To Connect to vpn click on VPN Switched (as highlighted, above). You will be connected to NextVpn in a moment.


3. Enjoy VPN communication
While VPN is established, all communications will be relayed via the VPN Server. You can access to any local servers and workstation on the destination network.