In this tutorial we will show you how to set up L2TP/IPSec VPN on Ubuntu
L2TP/IPSec VPN Setup instructions
1. Open Terminal

2. Type following commands one by one:
sudo add-apt-repository ppa:nm-l2tp/network-manager-l2tp
sudo apt-get update
sudo apt-get install network-manager-l2tp-gnome
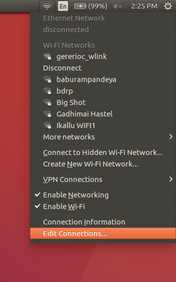
3.Click on wifi signal > “Edit Connections” then open "Network connections" window
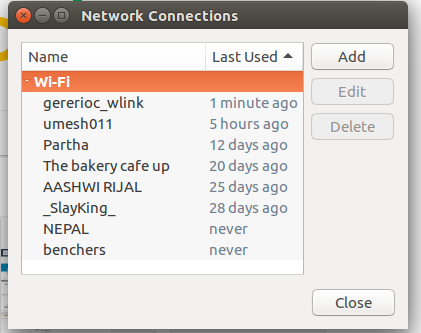
4. In the “Network Connections” window, press the "Add" button
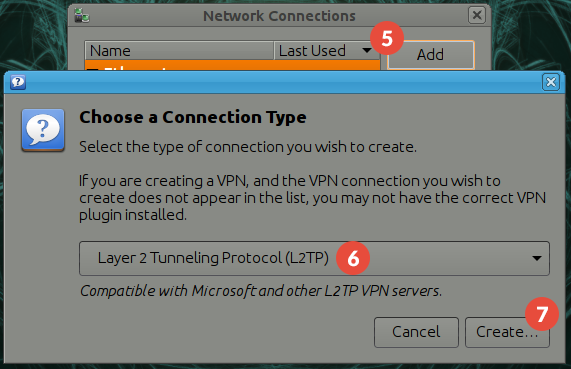
In the “Choose a Connection Type” window select “Layer 2 Tunneling Protocol (L2TP)” and press the “Create…” button
5. Select “Ipsec settings…”

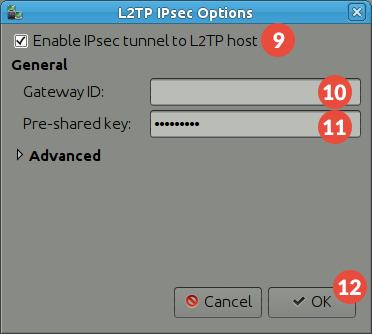
6. Check the “Enable IPsec tunnel to L2TP host” checkbox
Enter the IP address of VPNNext server you want to connect to in the “Gateway ID” field. You can find all the available servers in the package details in the Client area. Enter "vpn" in the “Pre-shared” key field . Press “OK”
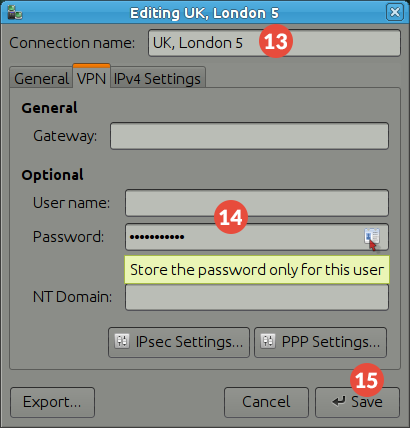
7. Set a name for your VPN connection in the “Connection name” field
Fill in the “User name” and “Password” fields your VPN username and password. You can find them in the client area on our website, by going to your package. Click on “Save”
8. The L2TP over IPsec VPN connection on Ubuntu is set up. Connect to VPN by choosing the created VPN connection from the “Network Manager”.